Yorkville Cafe Crawl

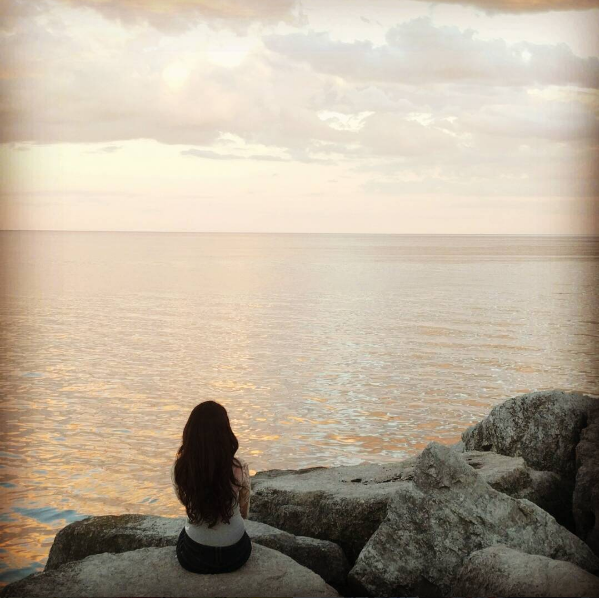
Yorkville – a gorgeous upscale neighborhood commonly referred to as the annex was once the Canadian capital of the hippie movement. Now, as one of the best places to find all your designer gems at your fingertips, it also has a huge selection of great food that will satisfy any foodie! But what I love most whilst shopping is a nice hot cup of tea in the crisp fall weather.  But let’s be honest, I enjoy a hot cup of tea whilst doing just about anything! And since I work in Yorkville, I tend to try out all the café’s in the area. Whether it is to sit and cuddle with a good book before work, or to grab a quick latte and pistachio croissant (SO GOOD!)  I have narrowed down the perfect café crawl list in Yorkville you have to visit, and a few of my favorites at each.

Because I am self-proclaimed tea addict, most of my choices will be tea inspired. if I do have coffee, it’s usually a latte or chocolate mocha. I have done my research for tasty coffee too, don’t worry!!

Sorry Coffee Co. (102 Bloor St W – In the Kit and Ace store)

  • Earl Grey Misto – this is the first on my list for a reason. I am OBSESSED! (As I’m sure you can tell by the number of pictures from this place!) The tea is absolutely amazing, fresh leaves that they steep with steamed milk and hot water. They have this liquid sugar that is a must with this to give it the perfect sweetness. I highly recommend it!
  • Chocolate hazelnut croissant – It’s the perfect sweet treat and it’s a small croissant, so you don’t feel guilty having the extra calories ( #sorrynotsorry )

1.png

2.png

Café Moi (1200 Bay St.)

  • Assortment of fresh tea leaves that smell & taste amazing! I especially like their iced teas infused with vanilla! So perfect on a hot day!
  • Hands down the BEST croissant I’ve ever has, the pistachio croissant is so worth it! It’s on the pricier side, but this is a heavenly treat! It’s made at the famous Parisian bakery Delysees (and I would also recommend stopping by that bakery if you’re ever around the area (780 King St. W)

3.png

Goldstruck Coffee (130 Cumberland St.)

  • Their Latte was quite strong, and a bold taste for a coffee lover. A bit too strong for me, I only have it once in a while when I really need a pick me up! But I have to say the beans were freshly roasted and you could definitely tell the difference! Next time I need a gold star caffeine rush (get it?!) I know where to go! The interiors are super cute, and have character the minute you walk in the doors! I love places like this for the ambiance as well, my only regret is that the menu doesn’t include any teas! Next time I’ll be sure to try out their baked goods as well!

Nespresso Boutique Bar (159 Cumberland St.)

  • The famous Nespresso coffee machine has a flagship store in Yorkville that’s super chic, with high ceilings and a café and retail store. The décor is beautiful, and I have yet to try their food but will be going by in the near future to try the lobster Panini! It’s a great date spot, after work coffee bar or to enjoy a latte after dinner, but the down side is that they don’t do take out! Not the best for those working in the area, but hopefully a suggestion they’ll take into consideration!

That about sums up some of my favorite places, and I guarantee you once you try them you’ll be back for more! I have a few places in the area that have sweet treats that deserve an honorable mention below! Hope you have a chance to check out a few of these places, and enjoy the gorgeous area while you’re at it!

  • Prairie Girl
  • Trattoria Nervosa
  • Holt’s café

Xo, Ally

5.png


4.png

6.png

Lost in Thought

Capture.PNG

Recently I’ve been cooking, baking and eating A LOT, and been so terrible at posting what I’ve been up to! I blame it on a busy summer, but I promise I will get back into it! As summer winds down, I will be spending more time cuddled up with my Pumpkin Spice Latte’s and writing up lots of new material! I also have decided to branch more into a lifestyle type blog, where I will still be putting out recipes, but will also include a lot more. A few of these are guides in different areas of food/coffee/TEA/things to do etc around Toronto, the GTA and anywhere life decides to take to for life & travel! I also want to include a few of the things I have a passion for which includes fashion, make up, hair, healthy lifestyle choices, working out, etc.

Working in Yorkville, I tend to put up a lot more pictures on my social media (particularly Instagram) of places that I frequently visit or try out. It’s such a gorgeous area of the city, and I will be dedicating a few posts specifically to Yorkville.

I also recently went to Vancouver, BC and had the most incredible time! I’ve been asked by a number of my friends and followers of suggestions of where to eat, sleep, visit, and what was and wasn’t worth it in the city. I have so much I want to share and can’t wait to get started!

I will be re-branding my blog likely in the near future, but will also be posting here until then. I’ll keep you all posted with that as soon as it happens! If you have anything else you would like me to do, please do comment and reach out to me, I would LOVE to know! Or just pop by and say hello!

In the meantime, check out my Instagram to keep updated on what I’m up to on the norm, and I’m looking forward to bringing you a lot of new material!

Tata for now,

Ally

Chocolate Chip Cookie Dough & White Chocolate Rosebud Pistachio Bark

bark.jpg

Recently, I have been baking up a storm and haven’t had any time to blog about it! I have tried to keep my Instagram page updated with pictures of the goodies (@Alyiar27) and now it’s time to go back and give some recipes to some new & old favorites! Currently, I’m obsessed with chocolate bark! I’ve made a variety of types (rosebud & pistachio, double chocolate Oreo, chocolate peppermint) but this one reminds me of the perfect ice-cream flavors! So for the hot weather we’re currently getting, I figured let’s start with this one (with a bowl of ice cream by my side of course)

So what’s the flavor you ask? Well, what can be better that cookie dough? Cookie dough stuffed in between two layers of chocolate and topped with cookie pieces! The best part, you can eat it as is or put it in any flavor of ice cream to take it to the next level! Currently my bowl is vanilla with chocolate cookie dough chunks; heavenly!!

BUT if you’re going for something a little fancier, I’m giving the recipe for two varieties! How does white chocolate pistachio rosebud bark sound? I made these for my best friends baby shower and they we’re a gorgeous addition to the sweet table! Not to mention they taste amazing!! If you’ve never eaten rosebuds or rose petals before, I highly recommend it! (I also highly recommend rosebud tea) Especially with chocolate!

Here’s the recipe to both, hope you enjoy!

A few Useful Tips:

  • Melt the chocolate in the microwave instead of a double boiler, I found the extra moisture made the chocolate a dryer consistency and more difficult to spread
  • Prep all the ingredients in bowls beforehand so you can work quickly
  • When working with white chocolate, keep in the fridge longer & work swiftly as the chocolate tends to melt quickly

Ingredients:

Cookie Dough Bark

  • 1 pkg Chocolate melts light (12oz)
  • 2-3 Butter cookies
  • Cookie dough

Cookie Dough

  • ½ cup unsalted butter
  • 1/3 granulated sugar
  • 1/3 cup brown sugar
  • 1 tsp vanilla extract
  • ½ tsp salt
  • 3 tbsp milk
  • 1 1/3 cup all-purpose flour
  • Handful mini chocolate chips

Directions:

Cookie Dough

  1. Cream together the butter, brown and white sugar until light and fluffy
  2. Add in salt, vanilla and milk and mix until combined
  3. Add in flour and mix on medium speed until smooth
  4. Fold in chocolate chips and form into a ball
  5. Place in the fridg
    e to cool

Chocolate Cookie Dough Bark

  1. Line a cookie sheet with parchment paper
  2. Melt half the chocolate and spread evenly on cookie sheet
  3. Place in the fridge for 15 minutes
  4. Remove the chocolate and the cookie dough from the fridge, spread cookie dough evenly out on the chocolate and pat down to make a flat layer
  5. Place in the fridge for 15 minutes
  6. Remove bark from fridge, melt remaining chocolate and spread over the cookie dough layer
  7. While chocolate is still warm, break up butter cookie pieces and decorate the top of the bark
  8. Place in fridge for 15 minutes
  9. Remove from the fridge, break into pieces and enjoy!cookie.jpg

White Chocolate Pistachio Bark

  • ½ cup pistachios
  • ½ cup dried rosebuds or dried rose petals
  • 1 pkg white chocolate melts (12oz)

Directions:

  1. Line a cookie sheet with parchment paper
  2. Chop pistachio up finely
  3. Heat white chocolate in microwave
  4. Pour white chocolate onto cookie sheet
  5. Break up the rosebuds and pour on top of melted chocolate keeping a few buds as well
  6. Evenly pour pistachio pieces on top of bark and slightly press in larger pieces
  7. Place in the fridge for 3 hours
  8. Remove from fridge and break apart the bark
  9. Place on a pretty & enjoy!

rose.jpg

Blueberry Crumble

bb crumblee.png

I have not met a person who has told me they did not like this crumble as of yet. I even had one of my co-workers (who swore she wouldn’t eat fruits unless they were blended in a smoothie) asking for more! They literally taste like you just had a tiny piece of heaven, and they’ve become a Sunday morning baking routine.  I love making it first thing in the morning, it makes the house smell amazing and its ready in time for brunch. And we all know that’s the favorite meal of the day! So let me know if you give this a try and have a new staple in your house as your go to dessert!

Another bonus for this recipe, the crust and the crumble is the same. Which means less work, and you can choose how much you want as the crust or the topping, depending on which part is your favorite. Mine personally: lots of crispy crumble topping yum!

A few Useful Tips:

  • I used my trusty Vitamix to pulse the rolled oats a little bit to make the texture a little smoother
  • Don’t use instant oats, that will make the mixture very dry and hard to work with

Ingredients:

IMG_4236.JPGCrust & Topping  

  • ½ cup butter (salted)
  • ¾ cup rolled oats
  • ½ cup granulated sugar
  • ¼ cup light brown sugar (not packed)
  • 1 cup all-purpose flour


Blueberry filling

  • 2 cups fresh blueberries
  • ¼ – 1/3 cup granulated sugar
  • 2 tbsp fresh lemon juice
  • 2 tbsp cornstarch
  • 1 tsp water

Directions:

  1. Preheat over to 350F. Choose your pan of choice, line with parchment paper and/or cooking spray
  2. *Optional* Use your vitamix or food processor and pulse oats once or twice for a second
  3. Mix dry ingredients together (flour, sugars, oats) in a bowl and add in melted butter
  4. Mix together and allow mixture to form clumps which will be used for the crumble topping
  5. Line the bottom of your pan of choice with the mixture and pack down to form a crust (keep aside about 1-1.5 cups of the mixture for the topping, depending on how thick you want the crust)

IMG_4860.jpg

Blueberry filling

  1. Add blueberries to a bowl and pour sugar and cornstarch on top evenly
  2. Pour lemon juice and water over the blueberry mixture and carefully mix together, trying not to crush any of the blueberries
  3. Pour blueberry mixture evenly over the crust and make sure all the liquid is poured into the layer
  4. Sprinkle the remaining crust mixture over the crumble, using your fingers to make clumps
  5. Bake for approx. 45 minutes – 1 hour at 350F, until golden brown. The blueberries will look like a jam texture.
  6. Cool for 1 hour completely before cutting into squares & enjoy!bb crumble.jpg


Chocolate Cheesecake Easter Eggs

That’s right! These little eggs are filled with a cheesecake filling and the “yolk” is a passion fruit & clementine mixture to add that perfect bit of tang! They remind me of Cadbury Cream Eggs, but to be honest I’m not really a fan. So with easter around the corner, I was super excited to make these. I mean after all, who doesn’t like cheesecake?! These treats were a huge hit for one of my close friend’s birthday celebration instead of a traditional cake, and everyone was able to have one of their own to enjoy.

IMG_4945.jpg

A few useful tips:

  • Buy a few extra eggs, a few of mine over hatched (pun intended!)
  • Don’t over whisk the whipping cream, it will turn hard and won’t be easy to fold into the mixture
  • Instead of using piping bags, I use a ziplock bag to put the cheesecake mixture in instead of using a spoon to fill the eggs. It makes it SO much easier to fill, and it ends up being a lot less cleaning too; win-win!

Ingredients

Yolk

  • 1 fresh passion fruit
  • 2 clementines
  • 1 tbsp butter

Cheesecake eggs 

  • 16 – 20 hollow chocolate eggs
  • 1 pkg (8 oz) room temperature cream cheese
  • 1/2 cup heavy whipping cream
  • 1/2 tsp vanilla extract
  • 1/4 cup icing sugar
  • 1/2 tsp fresh lemon juice

Directions

Yolk 

  1. In a small saucepan, melt butter
  2. Remove skin from the clementines and add in pulp to the saucepan
  3. Add in passion fruit to the mixture and continue to stir until simmering
  4. Mash the pulp and remove from heat
  5. Using a sieve, drain the liquid from the mixture and keep aside
  6. Place in liquid in the fridge for at least an hour to thicken

Cheesecake eggs 

  1. With a sharp knife, make a whole in each of the eggs and peel off tops of the egg
  2. Pour whipping cream into mixing bowl and use whist attachment, turn on medium speed and allow to whip into medium peaks (approx 3-5 minutes)
  3. Set whipping cream mixture aside
  4. In a mixing bowl add cream cheese, vanilla, lemon juice, icing sugar and whisk on medium speed until smooth (approx 1 minute)
  5. Fold in whipping cream mixture into the cream cheese mixture in three sections until just combined
  6. Transfer mixture into a piping bag or a ziplock (refer to useful tips) and fill chocolate eggs with cheesecake filling
  7. Place in the fridge for at least 1 hour to cool and set
  8. Remove from the fridge and make dent in the cheesecake with a small spoon or your finger
  9. Add the “yolk” mixture to the dent and place in fridge for half an hour to set
  10. Remove from fridge & enjoy your chocolate cheesecake eggs!IMG_4969.jpg

No Bake Oat Bars

This weekend I took a trip to my local health food store to stock up on some healthy ingredients for these beauties! As I was looking through the aisles, I noticed myself picking up all sorts of bars to try out for my afternoon snack. These usually give me inspiration for my own little treats, and this week I was looking for something that was sweet, healthy, and all natural after my cousin gave me a little challenge. She’s been on a healthy regime, so this recipe inspiration was for her. I did cheat a little though, using chocolate (it was dark..so it doesn’t count as cheating right?! ) but I can’t help it, I personally love that little bit of sweetness in my snacks! The results turned out delicious, and I had to make a second batch to give to her since the first was gone so fast! But i’m not complaining, this recipe is super quick to make and requires no baking whatsoever, so it didn’t take me long at all. So, lets begin!

A few useful tips:

  • If you’re using whole oats, I threw mine in my Vitamix for a few seconds to make it more of a powdery consistency, it was easier to work with
  • Make the almond butter fresh instead of store bought (need a recipe, look at my previous post on Homemade Almond Butter)
  • Use your hands and get a little messy, its not only fun and kind of therapeutic hehe, but the heat from your body melts the coconut oil in the mixture and helps everything to blend together nicely

IMG_4444.JPG

Ingredients

  • 1/2 cup rolled oats
  • 2/3 cup almond butter
  • 2 tbsp unsweetened coconut flakes
  • 1 tsp honey
  • 1 tbsp sunflower seeds
  • 1 tbsp pumpkin seeds
  • 1 tbsp coconut oil
  • 1 tbsp cocao nibs
  • 3 pieces of 65% dark chocolate, coarsely chopped
  • 1/4 tsp cinnamon (optional)

Directions

  1. If you’re using whole oats, use a Vitamix or food processor and make into powdery consistency
  2. Add all ingredients to a mixing bowl and mix until combined
  3. Use your hands to kneed the mixture to make sure everything has been incorporated evenly
  4. In a container (I used a 4 x 6 glass container) use a spoon or your hands to evenly spread out the mixture
  5. Place in the fridge to “set” for 10 – 30 minutes
  6. Remove from fridge, cut into little rectangles & enjoy!  IMG_4474.JPG
  7. Yield: 12          156 calories/serving

Cauliflower & Feta Bites

thumb_IMG_4376_1024.jpg

“All flowers have their purpose, even cauliflowers”

So one of my weaknesses are potatoes! I like em fried, baked, shoestring, curly, hash-browns… you get the point! So when I found a healthy alternative to potatoes, I was all in!

Cauliflower has a perfect consistency for these little fritters, and the yogurt sauce with them is just mmm so good!  No guilt snacks or perfect side dish to any dinner (I had it with chicken yesterday!) So here’s how to make them!

A few useful tips:

  • Cut off the leaves and stems and boil the florets alone in salt water
  • Have a bowl of ice water ready to transfer the cauliflower to stop the cooking process
  • Try and keep the cauliflower as dry as possible before mashing up, it will help when putting together the bites
  • Don’t worry if you find that the cauliflower isn’t sticking completely together before you put it in the pan, I promise you they will stay together once they start cooking
  • Lastly, use a lid to help steam the cauliflower completely through while in the pan
  • If you have a Vitamix, feel free to use that to pulse the cauliflower into little nibs after boiling 🙂

thumb_IMG_4340_1024.jpg

Ingredients

Bites 

  • 1 head of cauliflower florets
  • 1 clove of garlic minced
  • 1 large egg
  • 3 tbsp feta cheese
  • 1/4 tsp lemon zest
  • 1/2 tsp red pepper flakes
  • 1/2 tsp salt
  • 1/4 tsp pepper
  • 1/4 tsp paprika
  • 1/2 tsp baking powder
  • 1/2 cup all purpose flour
  • 1 tbsp olive oil to fry

Yogurt dip 

  • 1/2 cup yogurt
  • 1/4 tsp oregano flakes (dried)
  • pinch of salt & pepper to taste
  • 1 tsp mayo
  • 1 tsp Rene’s caesar dressing
  • 1/4 tsp garlic powder
  • 1-2 green chillies (optional)
  • 1 green onion (optional)

Directions

Bites 

  1. Cook cauliflower florets in boiling water until tender (approx 8 minutes) & transfer to ice cold water to stop cooking
  2. In a bowl, whisk together egg, garlic, salt & pepper & lemon zest
  3. in a separate bowl, mix together flour, baking powder, paprika & red pepper flakes
  4. Remove cauliflower from water, dry completely in a tower or paper towel, and transfer to bowl with egg mixture
  5. Crumble & add in feta cheese and mix to combine
  6. Add in flour mixture & mix until it forms a gooey texture
  7. Heat up skillet on medium heat, add oil in a pan & take a tablespoon of cauliflower mixture in hands, form into a disk and place on frying pan
  8. Do this for about 4-5 disks at a time, cooking for 2-4 minutes approx on each side while covering with a lid
  9. Place on a paper towel to drain oil & enjoy!

Yogurt dip 

  1. Combine all ingredients together in a bowl & mix together
  2. Cut up chillies & green onion, add to mixture and save a bit to use for garish thumb_IMG_4358_1024.jpg

These little healthy bites are delicious & nutritious! They can be whipped up in about half an hour, but they go just as quick! Hope you enjoy, leave a comment below & let me know how yours turned out! 🙂 Happy Friday!!

Yield: 12          70 calories/serving

3-Way Chocolate Truffles

thumb_IMG_4188_1024.jpg

With Valentines Day around the corner what better time to whip up come delicious chocolate truffles! It’s perfect for a DIY gift, or just to satisfy that chocolatey craving you may have!

And if nothing else, a little secret I like to do it drop a truffle or two in some milk and you have yourself a decadent hot chocolate! Yes, I am sipping on this as I write this post! (Side note, at Christmas time I add some candy cane garnish on top and you have the most amazing peppermint hot chocolate I’ve ever had!)

thumb_IMG_4130_1024.jpg

SO lets sip right into it

A few useful tips:

  • Use chocolate that is 70% dark or higher for best results
  • Use room temperature butter

Ingredients

  • 1 bar 70% or higher dark chocolate
  • 1 tsp butter (I used grass fed butter)
  • 1/2 cup heavy cream
  • a few drops of extract (vanilla, peppermint, lavender etc)

Directions

  1. Cut the bar of chocolate coursly and place into a glass bowl
  2. Heat the cream in a saucepan on the stove until simmering
  3. Add teaspoon of butter into the chocolate
  4. Pour the hot cream over the chocolate and butter and cover for one minute to keep in the heat
  5. Remove cover, add in extract of choice and stir chocolate until smooth
  6. Place chocolate in the fridge for at least 2 hours (I kept mine overnight)
  7. Remove chocolate from fridge, take a spoonful of chocolate in your hands and roll into a ball
  8. Roll the truffles around in condiments of choice and place on parchment paper (I used cacao nibs, cashews, & cocoa powder)
  9. Optional: place truffles in the freezer for two hours to ‘set’ remove and enjoy!

These are incredible little treats, super rich and creamy! I find that one is enough to satisfy my sweet tooth anytime of the day! I hope you enjoy them as much as me & my loved ones did & Happy Valentines Day to you! ❤

thumb_IMG_4213_1024.jpg


Homemade Almond Butter

February is heart month, so what better time to make something that improves heart health, is high in vitamin E and helps boost serotonin levels: almond butter! Almonds naturally lower your cholesterol and reduce the risk of heart disease! And, who knew almond butter was so tasty and so easy to make?! My brother actually inspired this post, as he has been asking me to make almond butter for a while now. I don’t know why it took me this long, but it will definitely be a staple from now on! It was delicious, super easy and so nutritious! And I also love that I know exactly what goes into it, so I don’t have to worry about all those extra preservatives either 🙂  just wholesome goodness!

IMG_3955.JPG

A few useful tips:

  • Roast the almonds and wait for them to cool completely if you’re buying un-roasted
  • Soak the almonds for a few hours or overnight. I did overnight (it helps the texture and you can get away using less oil this way)
  • Adjust the timing in the food processor slightly depending on the consistency of the butter you like (more time blending = smoother buttery texture)
  • You can use any oil you like, I used grapeseed oil to minimize the extra flavour but coconut, almond, canola, sunflower all work great!
  • Be careful using olive oil as the taste will be evident in your butter and not be the authentic almond butter you may be looking for
  • If you’re using a vitamix like me, you will hear a high pitched chugging sound towards the end, DON’T WORRY 🙂 your blender is fine and that sound is totally normal!

Ingredients (There’s only two! :))

  • 2 cups roasted almonds, soaked overnight
  • 1/3 cup grapeseed oilIMG_3946.JPG

Directions

  1. Take two cups of roasted almonds, cover with water until submerged and soak overnight
  2. Drain the almonds and rinse off any residue
  3. Put the almonds in your food processor first (I used the vitamix which I LOVE)
  4. Add the oil of choice on top of the almonds and cover with lid
  5. Turn blender on Variable 1, turn on machine and increase speed to high
  6. Use the tamper to make sure all the almonds reach the blade and let blend for about 1 minute, you should see the consistency of the butter getting smooth and delicious
  7. Turn off machine and store in a container for up to two weeks in the fridge
  8. Enjoy!

And that’s it! Easy peasy and so yummy! I’ve been using almond butter in and on everything since making this (Smoothies, Chia pudding parfait (picture below), apples, bananas, toast <with almond butter, avocados, cayenne pepper and some lemon juice; YUM!> and the options are endless!) If you have any suggestions or questions feel free to leave me a comment below.

Screenshot_20160204-145128.png